This is the multi-page printable view of this section. Click here to print.
Documentation
- 1: About
- 2: Getting started
- 2.1: Installation
- 2.1.1: Ubuntu
- 2.1.2: Linux using docker
- 2.1.3: Raspberry Pi 4
- 2.1.4: Windows 10
- 2.2: Mediapipe integration
- 3: Reference
- 3.1: Session
- 3.2: Memory
- 3.3: Objects
- 3.4: Node system
- 3.4.1: Compute nodes
- 3.4.2: Container nodes
- 3.4.3: Running
- 4: Examples
1 - About
Designing and developing real-time Computer Vision algorithms is a difficult task. On one hand, one needs to formulate the algorithm mathematically in such a way that enables fast calculations on modern compute hardware. On the other hand, such mathematical formulation has to be transformed into machine code, optimized and tested to satisfy system requirements such as hardware usage and frame rate. Accomplishing both tasks successfully is the job of research and engineering teams with highly specialized knowledge.
Lluvia has been designed around the idea of reducing the effort for designing and implementing Computer Vision algorithms for real-time applications. The engine is built on top the Vulkan graphics and compute API. By using Vulkan, it is possible to run the algorithms on any modern GPU that supports the API. The core libraries are coded in C++ and can be compiled for several operating systems, currently Linux and Android. Wrappers for high-level languages such as Python are maintained as well.
Workflow
Lluvia uses a compute graph to organize and schedule computations on the GPU. The development workflow circles around coding and debugging nodes in such a graph until the whole algorithm is built:
The node’s inputs, outputs and parameters are described in a Lua script . This description will later be used to instantiate nodes in the graph.
The node’s computation in the GPU is coded as a compute shader in Open GL Shading Language (GLSL). Shaders are compiled into SPIR-V intemediate representation for later load into the GPU.
The node’s description and compute shader are loaded into Lluvia’s runtime. After this, nodes can be instantiated to build the compute graph and be dispatched to the GPU.
From a user perspective, one needs to only care about describing nodes (inputs, outputs, compute shader, etc.) and connecting nodes to form a graph. Lluvia takes care of the low-level details of dispatching the graph for execution onto the GPU. This workflow allows porting the compute graph from one platform to another with ease.
Check the Getting Started guides for examples on how to describe computations in Lluvia.
Alternatives
There are many other alternatives to use for coding and deploying Computer Vision algorithms. The list below is by no means an exhaustive review. Please contact me if you want other frameworks to be included.
OpenCV The go-to alternative for fast prototyping and deployment of CV algorithms. OpenCV is a mature project that can be used on many platforms (Linux, OSX, Windows, Android). It contains a bast library of algorithms, some of them with GPU implementations.
Halide is a programming language for coding high-performance image processing algorithms. The language is embedded in C++ and can dispatch execution of the algorithms to CPUs and GPUs depending on the available hardware.
Mediapipe A framework for developing complex Computer Vision pipelines combining several frameworks such as OpenCV, TensorFlow, TFLite.
2 - Getting started
2.1 - Installation
2.1.1 - Ubuntu
Dependencies
Install the following packages in your system if they not available yet:
1
2
3
sudo apt install \ build-essential \ clang1 2 3 4curl https://bazel.build/bazel-release.pub.gpg | sudo apt-key add - echo "deb [arch=amd64] https://storage.googleapis.com/bazel-apt stable jdk1.8" | sudo tee /etc/apt/sources.list.d/bazel.list sudo apt update sudo apt install bazel1 2 3 4wget -qO - https://packages.lunarg.com/lunarg-signing-key-pub.asc | sudo apt-key add - sudo wget -qO /etc/apt/sources.list.d/lunarg-vulkan-1.3.211-focal.list https://packages.lunarg.com/vulkan/1.3.211/lunarg-vulkan-1.3.211-focal.list sudo apt update sudo apt install vulkan-sdkVerify that the SDK was successfully installed by running:
1vulkaninfoPython3 dependencies
1sudo apt install python3-pip
Build C++ Libraries
Clone and compile Lluvia’s C++ libraries:
| |
Run the tests to verify that your compilation runs properly:
| |
Python3 package
To build the Python3 package, execute the commands below from the repository’s top-level directory. You can create a virtual environment to isolate the installation:
| |
Open a Python3 interpreter and import lluvia:
| |
If the import completes successfully, lluvia is ready to use.
2.1.2 - Linux using docker
Install docker following the official documentation and the post installation guide.
Clone lluvia and build the container
| |
Run the container, mounting lluvia’s repository at /lluvia:
| |
Inside the container, build and test all of lluvia package:
| |
2.1.3 - Raspberry Pi 4
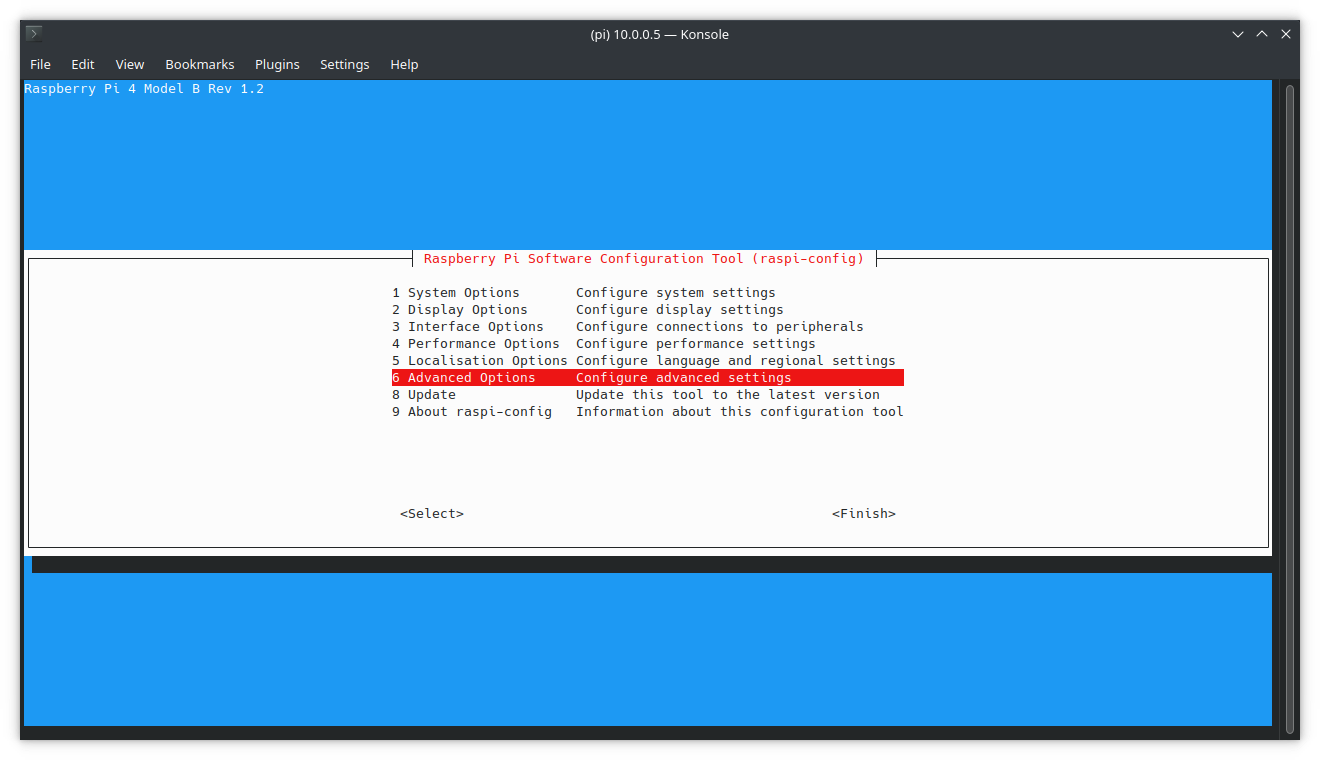
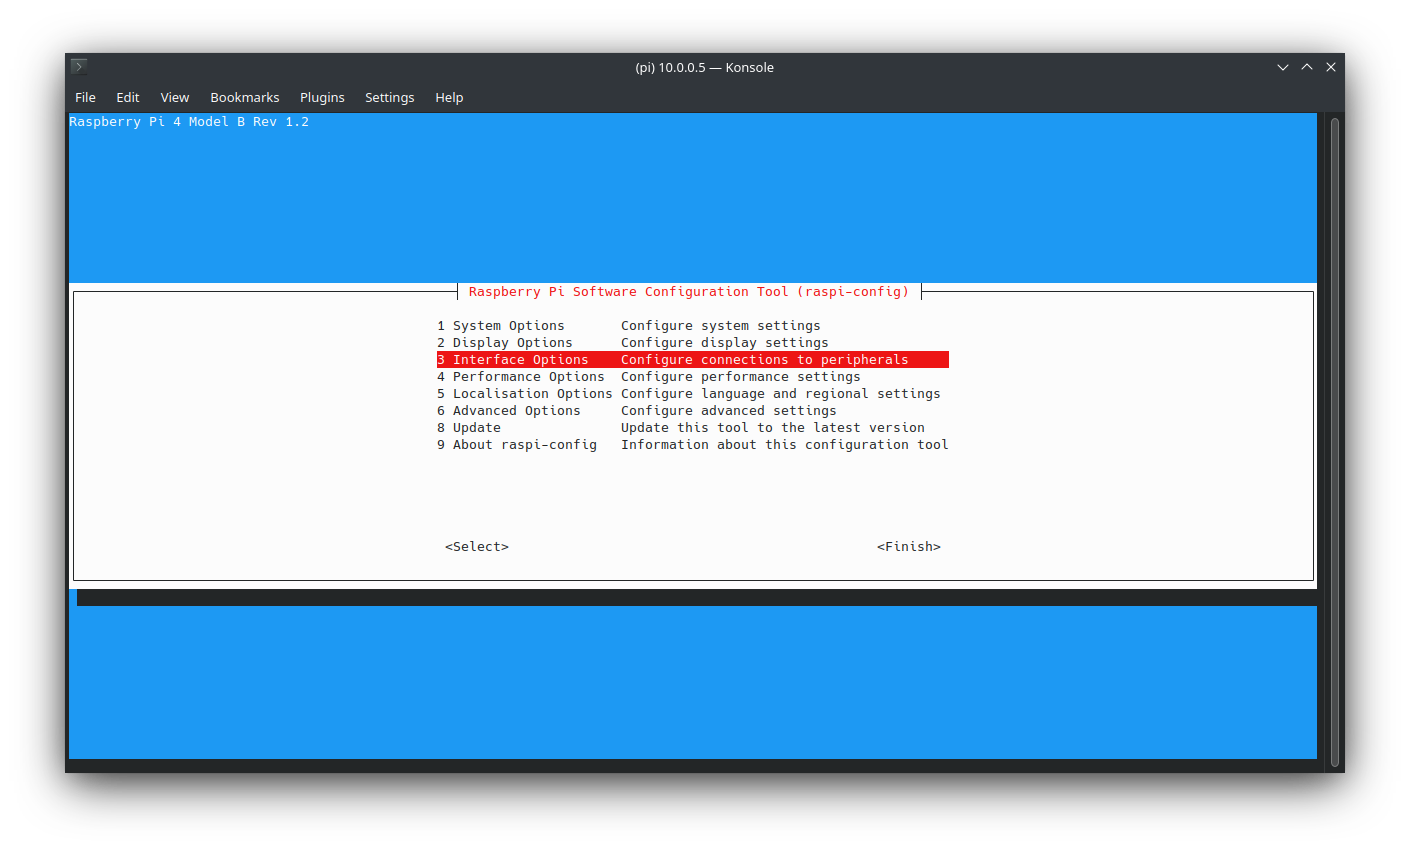
Raspberry Pi config
OS Installation
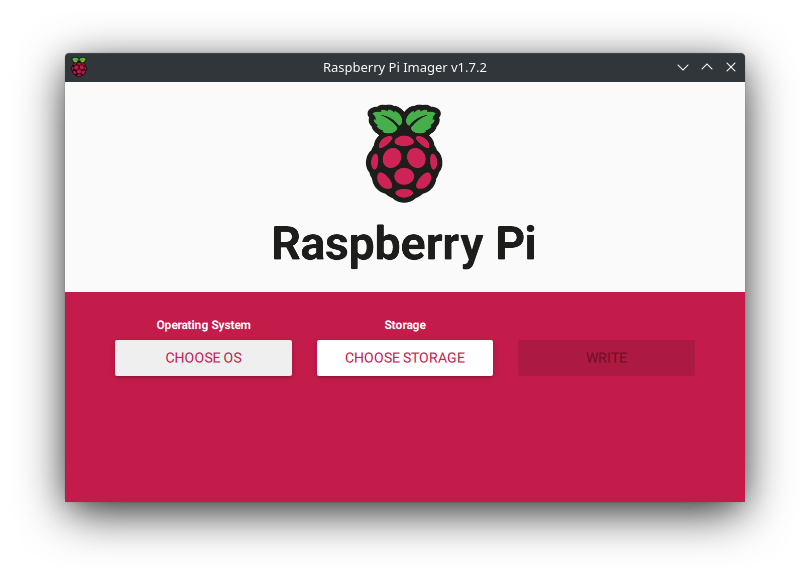
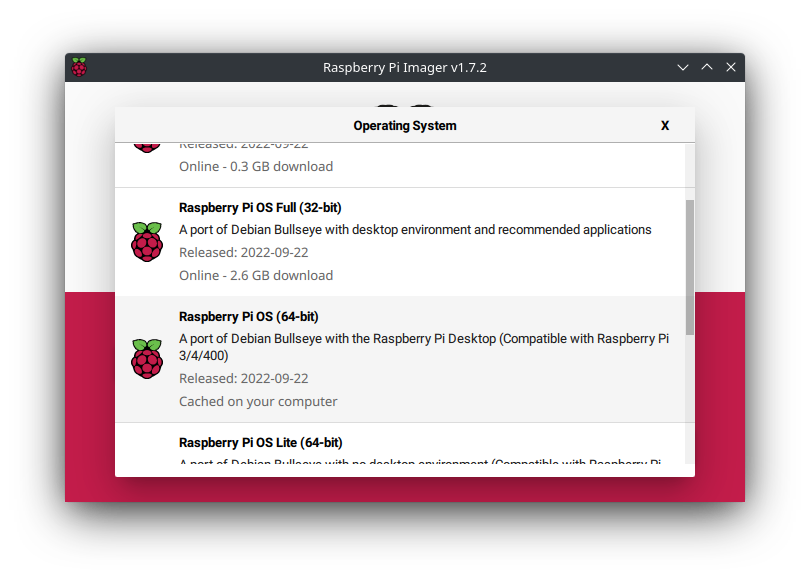
On the desktop machine, download the Raspberry Pi Imager and install a fresh version of the operating system in a micro SD card.
| |
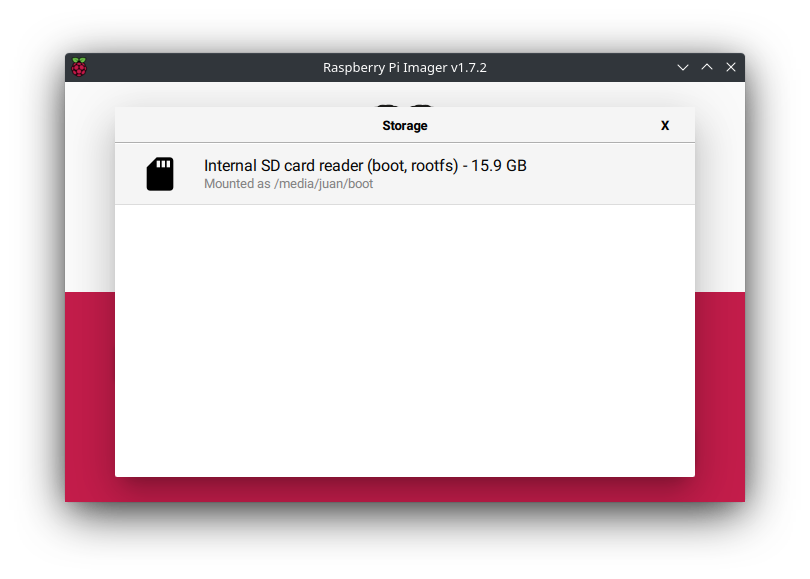
Go to extra settings and enable SSH access, configure the WiFi, if needed. Click in write and wait for the process to complete.
Insert the micro SD card in the RPi and next, update and upgrade the operating system:
| |
Expand storage
| |
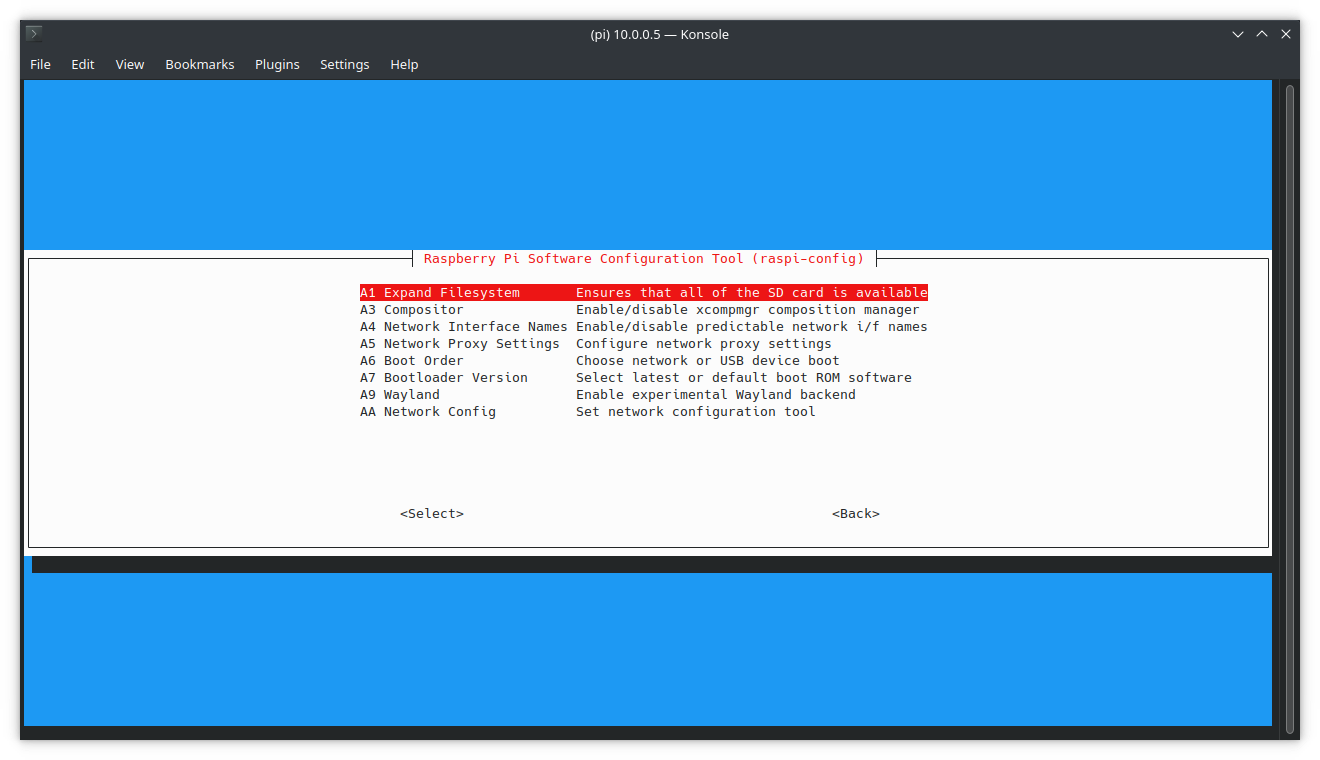
| |
Increase swap memory
Some of the instructions bellow require more memory than the one available in the RPi4. For this, it is recommended to increase the SWAP memory available to the system so that compilation does not fail unexpectedly. Open the /sbin/dphys-swapfile and /etc/dphys-swapfile, and edit the line CONF_MAXSWAP=<some_value> to 4096. After it, reboot the RPi.
| |
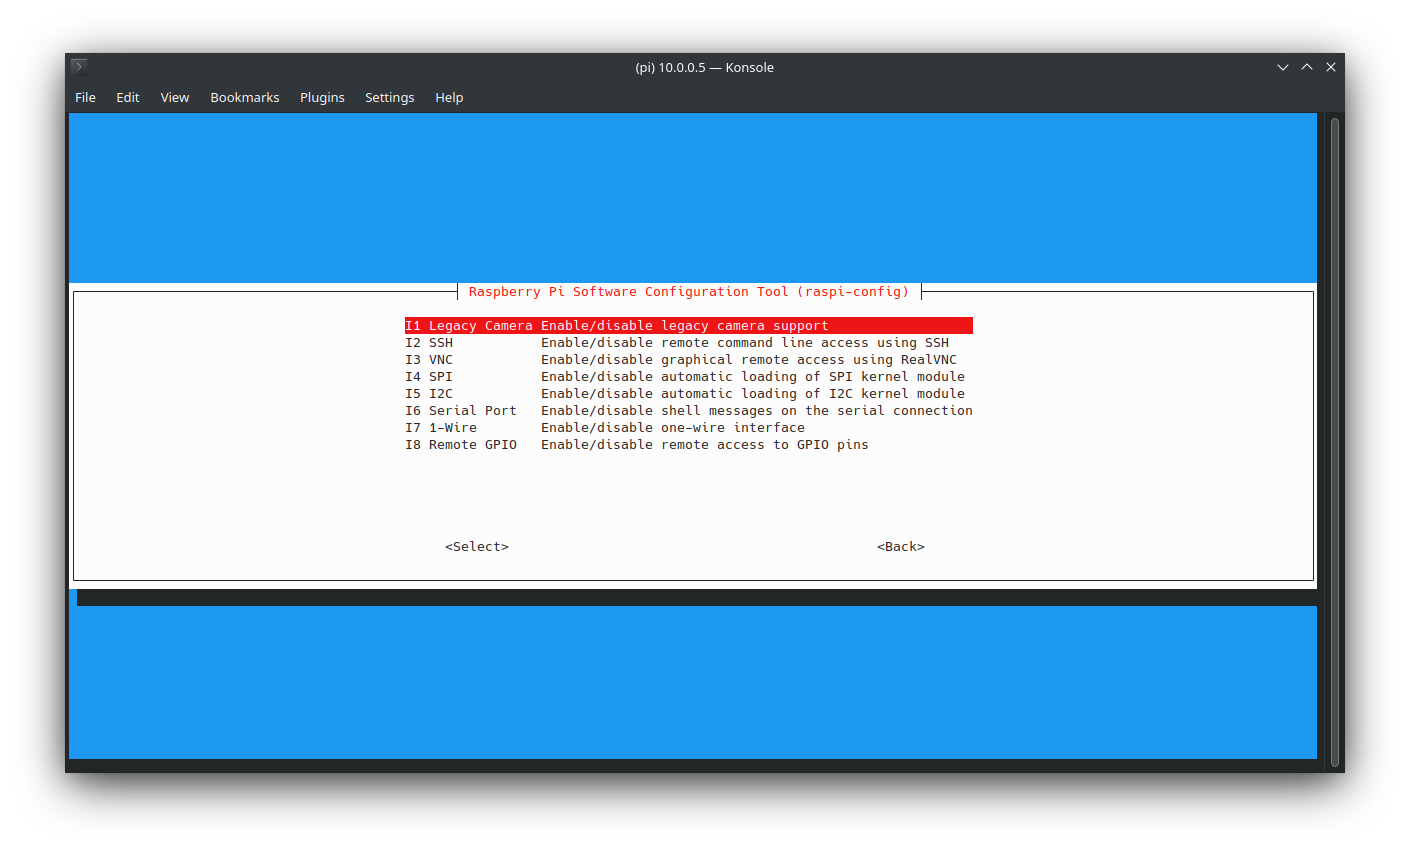
Camera module
If you have a camera module available, you can enable it by following the official guide
| |
| |
Vulkan SDK
Installation guide
The official installation instructions are available in the LunarG website.Dependencies
| |
Build and install
Download and build the Vulkan SDK
| |
Configure the VULKAN_SDK environment variable permanently in the system:
| |
Reload the profile:
| |
Install the SDK in the system:
| |
System installation
It is important to install the vulkan libraries as part of the operating system. When Bazel runs the Lluvia tests, is not able to find the layer libraries from theVULKAN_SDK environment variable.OpenCV
Dependencies
| |
Build
| |
Lluvia
Bazel
| |
Build and install C++ and Python packages
Install clang compiler
| |
Clone and build Lluvia
| |
Examples
With the Raspberry Pi camera module installed, it is possible to run the webcam demo located at samples/webcam/webcam.py. The command below configures the camera to output images at 320x240 resolution and fed to the webcam/HornSchunck container node, defined in the horn_schunck.lua script:
| |
The resulting color-encoded optical flow is displayed in a second window.
2.1.4 - Windows 10
Dependencies
Python2. This is needed for Bazel to be able to run Python binaries
1 2 3choco install python2 python -m pip install jinja2Python3 dependencies
1pip3 install cython numpy pytest jinja2 markupsafeVulkan SDK: follow the official installation instructions from LunarG.
Bazel: follow the official installation guide from bazel.build.
Clone and configure the repository
Clone the Lluvia repository from Github:
| |
Open platform/values.bzl and change the paths to Python2 and Python3 according to your installation. Initially the file looks like this:
| |
Build the C++ libraries
| |
Run the tests to verify that your compilation runs properly:
| |
Python3 package
To build the Python3 package, execute the commands below from the repository’s top-level directory.
| |
Open a Python3 interpreter and import lluvia package
| |
If the import completes successfully, lluvia is ready to use.
2.2 - Mediapipe integration
Mediapipe is a cross-platform framework for creating complex Computer Vision and Deep Learning pipelines both for offline and streaming applications. It includes support to OpenCV and TensorFlow. By integrating Lluvia in mediapipe, it is possible to leverage its runtime capabilities as well as the interfacing with other popular frameworks.
Setup
Platform
The following instructions are written for an Ubuntu host system.Follow the linux instructions to install the basic dependencies to build lluvia in your host machine.
Mediapipe
Clone the mediapipe repository in the same folder as lluvia.
| |
Setup Clang as default C++ compiler for mediapipe. Add the following line to mediapipe’s .bazelrc file
build:linux --action_env=CC=clang
Follow the installations instructions to configure OpenCV according to your installation. Also, enable GPU support. Once completed, run the hello_world application to check the build process:
| |
the output should look like:
I20221006 15:04:52.196460 12142 hello_world.cc:57] Hello World!
I20221006 15:04:52.196496 12142 hello_world.cc:57] Hello World!
I20221006 15:04:52.196501 12142 hello_world.cc:57] Hello World!
I20221006 15:04:52.196537 12142 hello_world.cc:57] Hello World!
I20221006 15:04:52.196563 12142 hello_world.cc:57] Hello World!
I20221006 15:04:52.196588 12142 hello_world.cc:57] Hello World!
I20221006 15:04:52.196615 12142 hello_world.cc:57] Hello World!
I20221006 15:04:52.196640 12142 hello_world.cc:57] Hello World!
I20221006 15:04:52.196666 12142 hello_world.cc:57] Hello World!
I20221006 15:04:52.196691 12142 hello_world.cc:57] Hello World!
Modifications to embed Lluvia as mediapipe’s dependency
The next step is to include lluvia as a dependency of mediapipe. Append the configuration below to mediapipe’s WORKSPACE file to configure lluvia as a local_repository:
| |
Rerun mediapipe’s hello_world binary again to confirm the new workspace configuration works:
| |
Extra configuration for Android builds
Install Android Studio, SDK 33 and SDK 30, and the NDK 21 (r21e). Configure the ANDROID_HOME and ANDROID_NDK_HOME environment variables in your .bashrc or .zshrc file, for instance:
| |
Install the default JDK and the ADB in the system:
sudo apt install default-jdk adb
WORKSPACE configuration
In addition to the WORKSPACE configuration mentioned above, add the following lines for Bazel to configure the Android SDK and NDK.
| |
lluvia-mediapipe repository
The lluvia-mediapipe project is an auxiliary repository containing the Calculators to interface with mediapipe. This repository needs to be cloned within mediapipe in order to consume its dependencies.
| |
The directory structure for all repositories should look like:
lluvia                          <-- lluvia repository
mediapipe                       <-- mediapipe repository
├── BUILD.bazel
├── docs
├── LICENSE
├── MANIFEST.in
├── mediapipe                   <--
│   ├── BUILD
│   ├── calculators
│   ├── examples
│   ├── framework
│   ├── gpu
│   ├── ...
│   ├── lluvia-mediapipe        <-- lluvia-mediapipe repository
├── ...
├── .bazelrc
└── WORKSPACE
Next, run the lluvia_calculator_test target to verify the build and the runtime is correctly configured:
| |
LluviaCalculator
The lluvia-mediapipe repository declares a new LluviaCalculator. This calculator is in charge of initializing Lluvia, binding input and output streams from mediapipe to lluvia ports, and running a given compute pipeline.
The figure below illustrates a basic mediapipe graph utilizing lluvia, while the code below shows the graph description using protobuffer text syntax
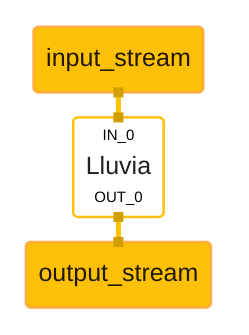
| |
where:
- The
enable_debugflag tells whether or not the Vulkan debug extensions used by Lluvia should be loaded during session creation. This flag might be set tofalsein production applications to improve runtime performance. - The
library_pathdeclare paths to node libraries (a.zipfile) containing Lluvia nodes (Container and Compute). This attribute can be repeated several times. - The
script_pathis the path to aluascript declaring aContainerNodethat Lluvia will instantiate as the “main” node to run inside the calculator. input_port_binding, maps mediapipe input tags to the mainContainerNodeport. In the example above, mediapipe’s input tagIN_0is mapped to lluvia’sin_imageport.output_port_bindingdoes the same for outputs of theContainerNode. Both input and output bindings have apacket_typeattribute indicating the expected type of the binding. Possible values are:IMAGE_FRAMEandGPU_BUFFER.
GPU_BUFFER support
Currently there is no support forGPU_BUFFER bindings. All bindings must be IMAGE_FRAME type.Android Archive build
The lluvia-mediapipe repo contains an example Android Archive build target that contains the LluviaCalculator as well as some mediapipe graph examples. To build the archive, run:
| |
The generated AAR file will be located at bazel-bin/mediapipe/lluvia-mediapipe/java/ai/lluvia/lluvia_aar.aar and can be exported into an Android project.
Examples
There are two example applications packed with lluvia-mediapipe
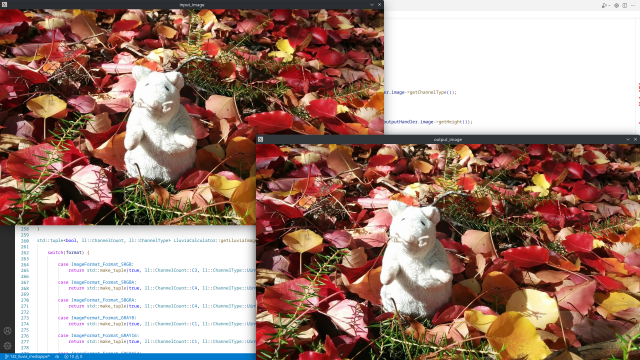
single_image
This app receives as command line arguments the path to an image file, a mediapipe graph definition and a lua script describing the ContainerNode to run inside of the LluviaCalculator.
The commands below execute the single_image app loading sample graphs packaged in the repository. The command assumes both lluvia and mediapipe repositories are cloned in the ${HOME}/git folder.
Passthrough
This graph simply copies the input image to the output, without any processing:
| |
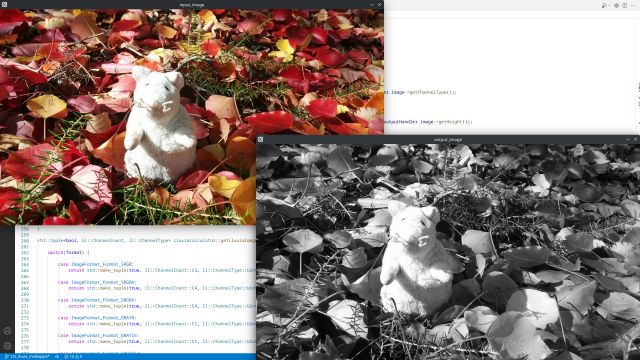
BGRA to Gray
This graph runs the lluvia/color/BGRA2Gray compute node to convert from the BGRA input to gray scale:
| |
webcam
This application tries to open the default camera capture device in the host system using OpenCV VideoCapture class. Then it feeds the mediapipe graph the captured frames to be processed by the LluviaCalculator.
BGRA to Gray
| |
Horn and Schunck optical flow
This is a more elaborate graph running inside the LluviaCalculator. First, the input image is converted from BGRA to gray scale, then is passes through the Horn and Schunck optical flow algorithm, and finally, the estimated optical flow is converted to RGBA (and then to BGRA) for visualization:
@startuml
skinparam linetype ortho

state LluviaCalculator as "LluviaCalculator" {

    state input_stream as "IN_0:input_stream" <<inputPin>>
    state output_stream as "OUT_0:output_stream" <<outputPin>>

    state ContainerNode as "mediapipe/examples/HornSchunck" {

        state in_image <<inputPin>>

        state BGRA2Gray
        state HS as "HornSchunck"
        state Flow2RGBA
        state RGBA2BGRA

        input_stream -down-> in_image

        in_image -down-> BGRA2Gray
        BGRA2Gray -down-> HS: in_gray
        HS -down-> Flow2RGBA: in_flow
        Flow2RGBA -down-> RGBA2BGRA: in_rgba

        RGBA2BGRA -down-> out_image <<outputPin>>
    }


  out_image -down-> output_stream <<outputPin>>
}

@enduml
The command to run the example is:
| |
References
3 - Reference
The diagram below illustrates the suggested order for reading the documentation:
graph
    Session
    Memory

    Session --> Memory
    Memory --> Objects
    Objects --> Buffer
    Objects --> Image
    Image --> ImageView

    Session --> NodeSystem
    NodeSystem --> ComputeNode
    ComputeNode --> ContainerNode

    %% Interaction
    click Session "/docs/reference/session" "Session"
    click Memory "/docs/reference/memory" "Memory"
    click Objects "/docs/reference/objects" "Objects"
    click Buffer "/docs/reference/objects/buffer" "Buffer"
    click Image "/docs/reference/image" "Image"
    click ImageView "/docs/reference/image_view" "ImageView"
    click NodeSystem "/docs/reference/node_system" "NodeSystem"
    click ComputeNode "/docs/reference/node_system/compute_node" "ComputeNode"
    click ContainerNode "/docs/reference/node_system/container_node" "ContainerNode"
3.1 - Session
A Session is the main object in a Lluvia application. It holds the references to the underlying device used for computation.
To see the available devices, run:
| |
| |
and the output can look like:
id: 7040 type: DiscreteGPU   name: GeForce GTX 1080
id: 0    type: CPU           name: llvmpipe (LLVM 12.0.0, 256 bits)
id: 1042 type: IntegratedGPU name: Intel(R) HD Graphics 4600 (HSW GT2)
To create a session:
| |
| |
Note
If no device is passed during the creation of aSession, the default behavior is to select the first
device from the list of available ones.The enableDebug flag enables the Vulkan validation layers for receiving messages about bad usage of the API. This can be useful while building your compute pipelines, but should be disabled in Production for reducing the communication overhead with the GPU.
Several object types are creating from a session, among the most important are:
graph
    Session --> Memory
    Session --> Program
    Session --> CommandBuffer
    Session --> Duration
    Session --> ComputeNode
    Session --> ContainerNode
What’s next
Check the Memory page to know about the different memory types in Lluvia.
3.2 - Memory
Memory objects represent regions of memory that can be used to allocate objects. Lluvia uses the memory types defined by the Vulkan API. You may also refer to this article by Adam Sawicki on how memory is offered by different GPU vendors.
Memory types
Memory objects are created from a Lluvia Session. The code block below enumerate the available memory options:
| |
| |
Memory index: 0
    supported flags: ['DeviceLocal']

Memory index: 1
    supported flags: ['HostCoherent', 'HostVisible']

Memory index: 2
    supported flags: ['HostCached', 'HostCoherent', 'HostVisible']

Memory index: 3
    supported flags: ['DeviceLocal', 'HostCoherent', 'HostVisible']
The possible MemoryPropertyFlags values are:
| Flag | Description |
|---|---|
DeviceLocal | The memory is visible to the GPU. |
HostVisible | The memory is visible to the host (CPU). |
HostCoherent | If set, it indicates that read/write operations on the memory are coherent. That is, no flushing is needed for making the values visible by other consumers. |
HostCached | If set, it indiates that read/write operations travel through the host memory cache. Operations may be faster, but need flushing to make the values available to other consumers. |
LazilyAllocated | Not used in Lluvia. |
For Lluvia, the two most important memory flag tuples are:
| Tuple | Description |
|---|---|
(DeviceLocal) | The memory is visible to the GPU only. Computations will be performed on objects allocated in this memory. |
(DeviceLocal, HostVisible, HostCoherent) | The memory is visible to both the GPU and the host CPU. Writings to the memory from the host CPU are coherent. This memory will be used mainly for transfering data to and from the GPU. |
Creation
The code block below shows how to create memory objects:
| |
| |
Memories are created by passing the set of flags the memory should have. It is possible to also pass the size of a page, which defaults to 32MB, and an extra parameter to indicate if the flags should match perfectly with any of those listed by session.getSupportedMemoryPropertyFlags().
Internally, a Memory manages regions of memory as pages. On each page, there can be several objects allocated, such as Buffer or Image.
stateDiagram-v2

    Memory --> Page_0
    Memory --> Page_1
    Memory --> Page_2

    state Page_0 {
        Buffer_0
        Buffer_1
    }

    state Page_1 {
        Image_1
        Buffer_2
    }

    state Page_2 {
        Image_2
    }
It is possible to query the memory attributes as:
| |
| |
which prints:
flags      : ['DeviceLocal', 'HostCoherent', 'HostVisible']
isMappable : True
pageCount  : 0
pageSize   : 33554432
In particular, the isMappable flag tells whether or not the memory space can be mapped to the host memory space. At the moment of creation, there are no actual pages allocated, and hence, pageCount equals 0.
Object allocation
There are two types of objects that can be allocated from a Memory:
graph
    Memory --> Buffer
    Memory --> Image

    click Buffer "/docs/reference/objects/buffer" "Buffer"
    click Image "/docs/reference/image" "Image"
The code block below shows how to allocate a buffer and an image object. Each allocated object has an allocationInfo to see the allocation values.
| |
| |
The amount of memory reserved for a given object can be higher than the actual needed. This is because Vulkan imposes certain requirements on the allocation such as alignment.
buffer:
  page         : 0
  offset       : 2048
  left padding : 0
  size         : 1024

image:
  page         : 0
  offset       : 0
  left padding : 0
  size         : 2048
What’s next
Check the Objects page for an overview of the objects available in Lluvia.
3.3 - Objects
3.3.1 - Buffer
Buffers are unstructured regions of contiguous memory. Buffers are created from Memory objects:
| |
| |
The first parameter is the requested size in bytes. The usageFlags indicated the intended usage of this buffer; the values are taken directly from the Vulkan BufferUsageFlagBits. The most used values are:
| Flag | Description |
|---|---|
StorageBuffer | Indicates that the buffer is going to be used for general storage. |
TransferDst | Indicates that the buffer can be used as destination for transfer commands. |
TransferSrc | Indicates that the buffer can be used as source for transfer commands. |
3.3.2 - Image
3.3.3 - ImageView
3.4 - Node system
%%{init: {'theme': 'neutral', 'themeVariables': {'fontSize': '32px', 'primaryColor': '#FF0000'}}}%%

classDiagram

    class Session
    class Memory
    class Program

    class Buffer
    class Image
    class ImageView

    class Node
    class ComputeNode
    class ContainerNode

    class CommandBuffer

    Session "1" --> "*" Memory
    Session "1" --> "*" Node
    Session "1" --> "*" CommandBuffer

    Memory "1" --> "*" Buffer: allocates
    Memory "1" --> "*" Image: allocates
    Image "1" --> "*" ImageView: creates

    Node <|-- ComputeNode
    Node <|-- ContainerNode

    ComputeNode "1" --> "1" Program

    ContainerNode "1" --> "*" ComputeNode: contains
    ContainerNode "1" --> "*" ContainerNode: contains